Difference between revisions of "OpenNebula Attach Additional Storage To A Virtual Machine"
Jump to navigation
Jump to search
(Created page with " 1. Open OpenNebula Sunstone and login. 2. Go to “Virtual Resources” in the left menu and click “Virtual Machines” in the dr...") |
Client Admin (talk | contribs) |
||
| (19 intermediate revisions by 3 users not shown) | |||
| Line 1: | Line 1: | ||
[[Category:OpenNebula]] | |||
[[Category:How To]] | |||
[[Category:CloudInfrastructure]] | |||
#[[OpenNebula_Administrative_Functions | Log into OpenNebula Sunstone]]. | |||
# You can attach and existing disk image or [[How To Create a New Disk Image in OpenNebula | you can create a new one.]] | |||
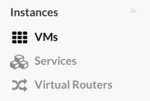
# Go to “Instances” in the left menu and click on “VMs” in the drop down menu. | |||
[File:VM_menu.png|thumb|none|upright=0.5]] | #:[[File:VM_menu.png|thumb|none|upright=0.5]] | ||
#: <br> | |||
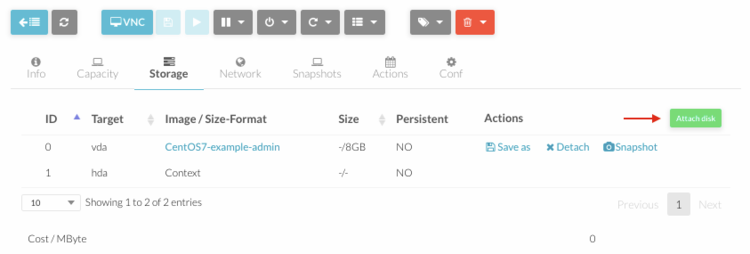
# Click on the virtual machine you need to add the storage and go to "Storage" menu. | |||
[[File:vm_storage_menu.png|thumb|none|upright=2.5]] | #:[[File:vm_storage_menu.png|thumb|none|upright=2.5]] | ||
#: <br> | |||
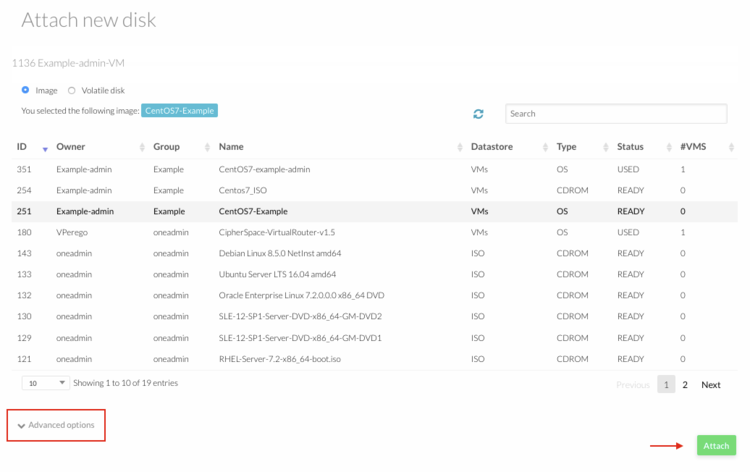
# Click on the "Attach Disk" button. A flyout will appear where you can select the image you want to attach. | |||
[[File:vm_attach_disk.png|thumb|none|upright=2.5]] | #:[[File:vm_attach_disk.png|thumb|none|upright=2.5]] | ||
#: <br> | |||
[[File:Attach_cache.png|thumb|none|upright= | # Click on "Advanced Option" and select "none" as cache option. | ||
#:'''Warning: without that option, a VM cannot be live migrated. In case the host (server on which the VM is running on) needs to be taken out for maintenance your VM will have to be shutdown.''' | |||
#:[[File:Attach_cache.png|thumb|none|upright=1.5]] | |||
#: <br> | |||
# Click on the "Attach" button to add the storage to the Virtual Machine. | |||
#: <br> | |||
# If you want to have the storage attached to the virtual machine next time it is instantiated, you must update the machine's template accordingly. See [[OpenNebula_Templates#Configure Template| Configure Template]]. | |||
Latest revision as of 22:14, 20 March 2017
- Log into OpenNebula Sunstone.
- You can attach and existing disk image or you can create a new one.
- Go to “Instances” in the left menu and click on “VMs” in the drop down menu.
- Click on the virtual machine you need to add the storage and go to "Storage" menu.
- Click on the "Attach Disk" button. A flyout will appear where you can select the image you want to attach.
- Click on "Advanced Option" and select "none" as cache option.
- Warning: without that option, a VM cannot be live migrated. In case the host (server on which the VM is running on) needs to be taken out for maintenance your VM will have to be shutdown.
- Click on the "Attach" button to add the storage to the Virtual Machine.
- If you want to have the storage attached to the virtual machine next time it is instantiated, you must update the machine's template accordingly. See Configure Template.


