Difference between revisions of "OpenNebula Templates"
Jump to navigation
Jump to search
| Line 2: | Line 2: | ||
==Create a new Template== | ==Create a new Template== | ||
#[[OpenNebula_Administrative_Functions | Log into OpenNebula Sunstone]]. | |||
#Go to “Virtual Resources” in the left menu and click on “Templates” in the drop down menu. | |||
#:[[File:Templates_menu.png|thumb|none|upright=0.5]] | |||
#:<br> | |||
#Click on the "+" button to create a new template. | |||
[[File:Templates_menu.png|thumb|none|upright=0.5]] | |||
===Configure Template=== | ===Configure Template=== | ||
The basic procedure is as follows: | The basic procedure is as follows: | ||
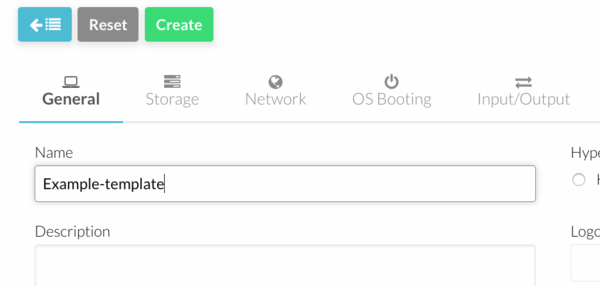
* Add a template name in "General" menu. | * Add a template name in "General" menu. | ||
[[File:Template_name.png|thumb|none|upright=2]] | [[File:Template_name.png|thumb|none|upright=2]] | ||
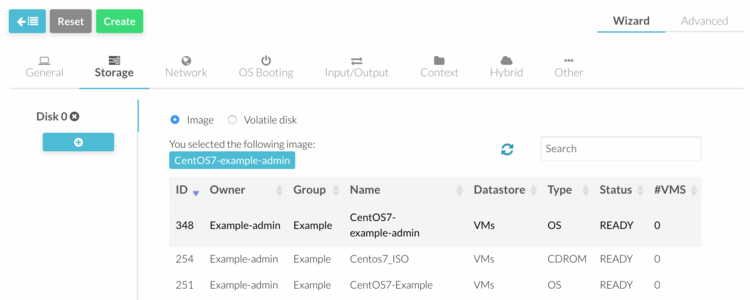
* Add storage disks in "Storage" menu. | * Add storage disks in "Storage" menu. | ||
[[File:Template_storage.png|thumb|none|upright=2.5]] | [[File:Template_storage.png|thumb|none|upright=2.5]] | ||
| Line 26: | Line 17: | ||
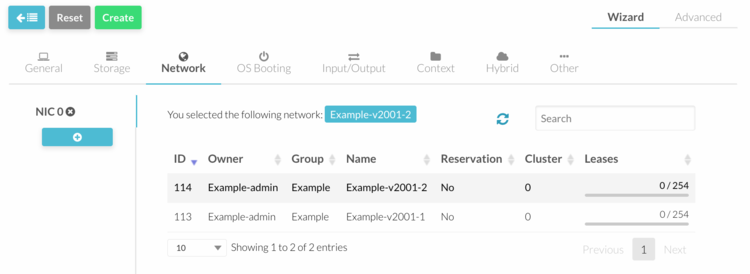
* Add a network interface in "Network" menu. If a fixed ip address is required, click on "Advanced Option" button and type the fixed address in the "IP" field. | * Add a network interface in "Network" menu. If a fixed ip address is required, click on "Advanced Option" button and type the fixed address in the "IP" field. | ||
[[File:Template_interface.png|thumb|none|upright=2.5]] | [[File:Template_interface.png|thumb|none|upright=2.5]] | ||
| Line 38: | Line 30: | ||
* In "Context" menu, you can define a root password under "Custom Vars". Add the following entries: KEY= ROOT_PASSWORD, VALUE= "password" and press "Add" button. | * In "Context" menu, you can define a root password under "Custom Vars". Add the following entries: KEY= ROOT_PASSWORD, VALUE= "password" and press "Add" button. | ||
[[File:Template_rootpwd.png|thumb|none|upright=2.5]] | [[File:Template_rootpwd.png|thumb|none|upright=2.5]] | ||
| Line 44: | Line 35: | ||
==Update a Template== | ==Update a Template== | ||
#[[OpenNebula_Administrative_Functions | Log into OpenNebula Sunstone]]. | |||
#Go to “Virtual Resources” in the left menu and click on “Templates” in the drop down menu. | |||
#:[[File:Templates_menu.png|thumb|none|upright=0.5]] | |||
#:<br> | |||
#Click on the template and press "Update" button. | |||
#Make the necessary changes and press the green "Update" button to save. | |||
[[File:Templates_menu.png|thumb|none|upright=0.5]] | |||
Revision as of 13:27, 22 September 2016
Create a new Template
- Log into OpenNebula Sunstone.
- Go to “Virtual Resources” in the left menu and click on “Templates” in the drop down menu.
- Click on the "+" button to create a new template.
Configure Template
The basic procedure is as follows:
- Add a template name in "General" menu.
- Add storage disks in "Storage" menu.
- Add a network interface in "Network" menu. If a fixed ip address is required, click on "Advanced Option" button and type the fixed address in the "IP" field.
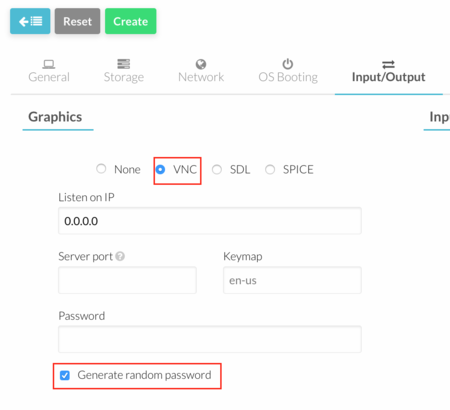
- In "Input/Output" menu, select "VNC" Graphics and tick "Generate Random Password".
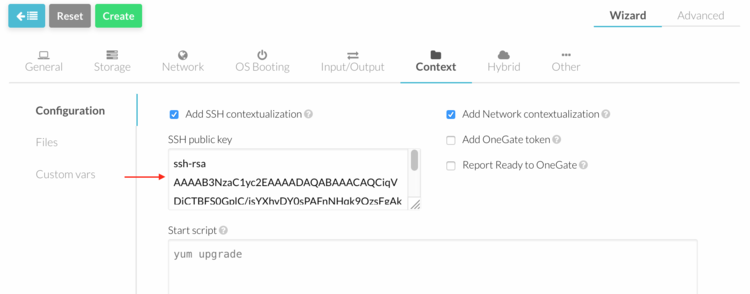
- In "Context" menu, add SSH keys in the "Public Key" field and make sure that "Add SSH contextualization" and "Add Network contextualization" are ticked.
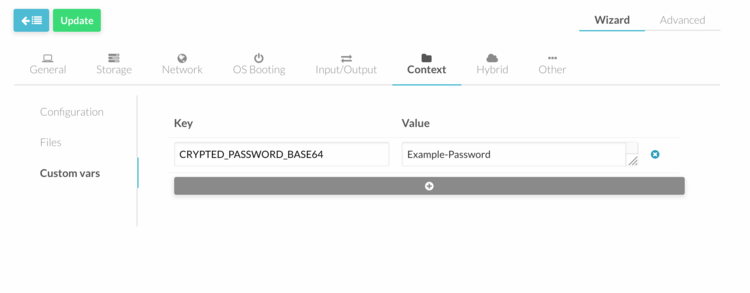
- In "Context" menu, you can define a root password under "Custom Vars". Add the following entries: KEY= ROOT_PASSWORD, VALUE= "password" and press "Add" button.
4. Click "Create" button.
Update a Template
- Log into OpenNebula Sunstone.
- Go to “Virtual Resources” in the left menu and click on “Templates” in the drop down menu.
- Click on the template and press "Update" button.
- Make the necessary changes and press the green "Update" button to save.

