Difference between revisions of "OpenNebula Templates"
Jump to navigation
Jump to search
| Line 46: | Line 46: | ||
==Update a Template== | ==Update a Template== | ||
1.[[OpenNebula_Administrative_Functions | Log into OpenNebula Sunstone]]. | |||
2. Go to “Virtual Resources” in the left menu and click “Templates” in the drop down menu. | |||
2. Go to “Virtual Resources” in the left menu and click on “Templates” in the drop down menu. | |||
[[File:Templates_menu.png|thumb|none|upright=0.5]] | [[File:Templates_menu.png|thumb|none|upright=0.5]] | ||
| Line 56: | Line 57: | ||
4. Make the changes and press "Update" | 4. Make the necessary changes and press the green "Update" button to save. | ||
Revision as of 10:14, 16 September 2016
Create a new Template
1. Log into OpenNebula Sunstone.
2. Go to “Virtual Resources” in the left menu and click on “Templates” in the drop down menu.
3. Click on the "+" button to create a new template.
Configure Template
The basic procedure is as follows:
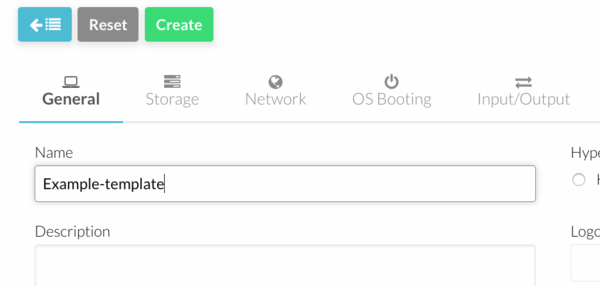
- Add a template name in "General" menu.
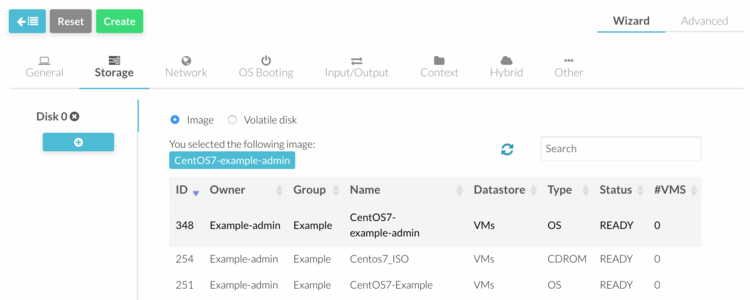
- Add storage disks in "Storage" menu.
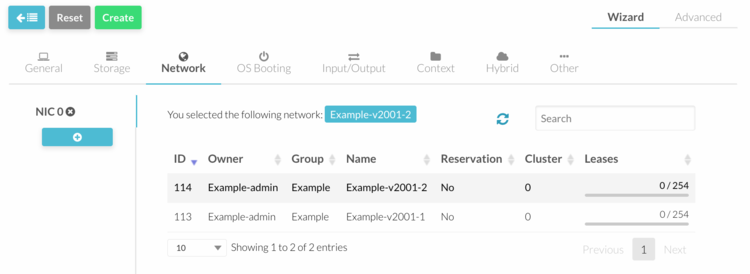
- Add a network interface in "Network" menu. If a fixed ip address is required, click on "Advanced Option" button and type the fixed address in the "IP" field.
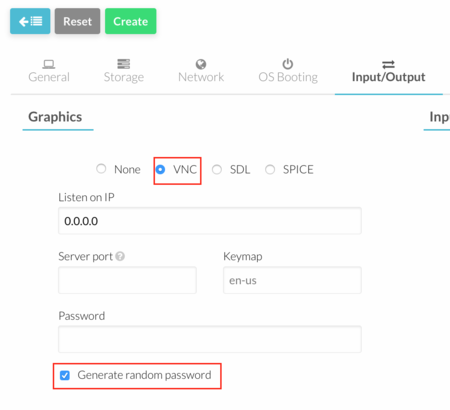
- In "Input/Output" menu, select "VNC" Graphics and tick "Generate Random Password".
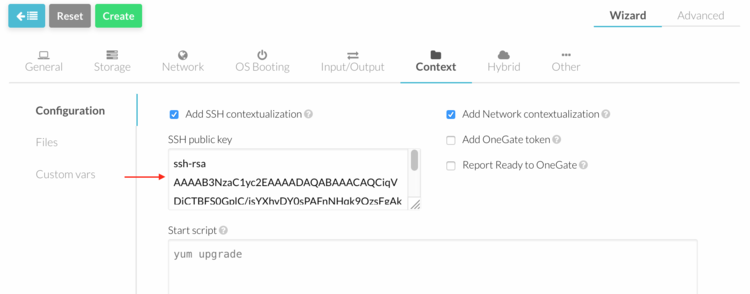
- In "Context" menu, add SSH keys and flag "Add SSH contextualization".
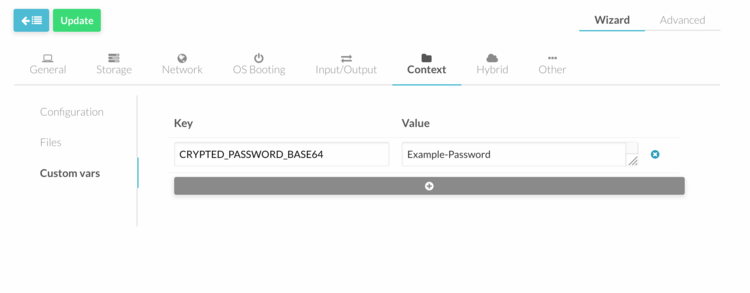
- In "Context" menu a root password could be defined under "Custom Vars". Add following value : KEY= ROOT_PASSWORD, VALUE= "password" and press "Add" button.
4. Click "Create" button
Update a Template
1. Log into OpenNebula Sunstone.
2. Go to “Virtual Resources” in the left menu and click on “Templates” in the drop down menu.
3. Click on the template and press "Update" button.
4. Make the necessary changes and press the green "Update" button to save.

