Difference between revisions of "OpenNebula Attach Additional Storage To A Virtual Machine"
Jump to navigation
Jump to search
| Line 14: | Line 14: | ||
5. Click "Attach Disk" button. A flyout will appear where you can select the storage. | 5. Click on the "Attach Disk" button. A flyout will appear where you can select the storage. | ||
[[File:vm_attach_disk.png|thumb|none|upright=2.5]] | [[File:vm_attach_disk.png|thumb|none|upright=2.5]] | ||
6. | 6. Click on "Advanced Option" and select "none" as cache option. | ||
[[File:Attach_cache.png|thumb|none|upright=1.5]] | [[File:Attach_cache.png|thumb|none|upright=1.5]] | ||
7. Click "Attach" button to add the storage to the Virtual Machine. | 7. Click on the "Attach" button to add the storage to the Virtual Machine. | ||
8. | 8. If you want to have the storage attached to the virtual machine next time it is instantiated, update the machine template accondingly. | ||
Revision as of 09:58, 16 September 2016
1. Log into OpenNebula Sunstone.
2. Create an additional datablock storage.
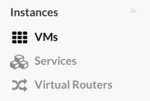
3. Go to “Virtual Resources” in the left menu and click on “Virtual Machines” in the drop down menu.
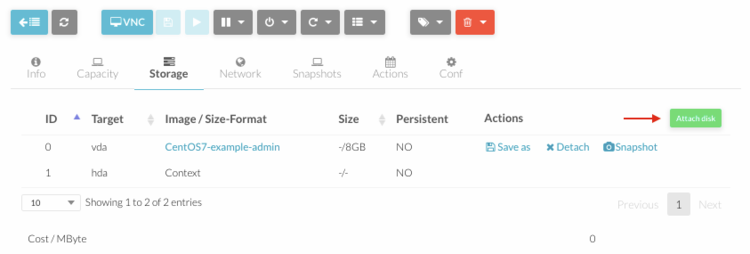
4. Click on the virtual machine you need to add the storage and go to "Storage" menu.
5. Click on the "Attach Disk" button. A flyout will appear where you can select the storage.
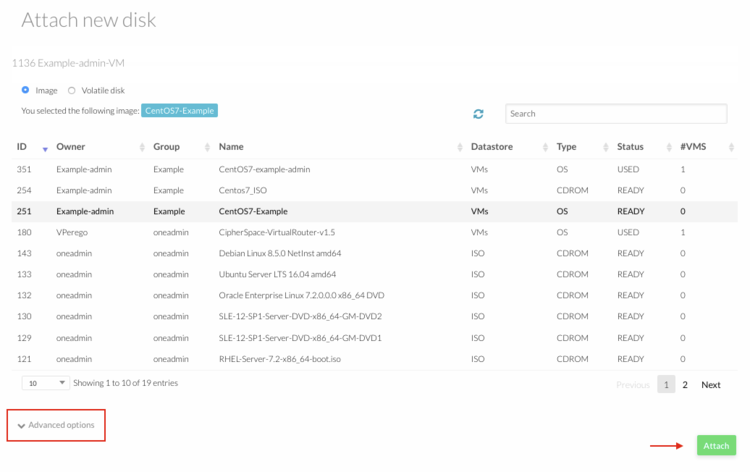
6. Click on "Advanced Option" and select "none" as cache option.
7. Click on the "Attach" button to add the storage to the Virtual Machine.
8. If you want to have the storage attached to the virtual machine next time it is instantiated, update the machine template accondingly.


