Difference between revisions of "OpenVPN Guide OSX"
| Line 76: | Line 76: | ||
If Tunnelblick isn’t already launched, double-click on the “Tunnelblick” app located in your “Applications” folder. The following icon appears on the top right of your screen: | If Tunnelblick isn’t already launched, double-click on the “Tunnelblick” app located in your “Applications” folder. The following icon appears on the top right of your screen: | ||
[[File:Tunnelblick_Run_1.png|border]] | |||
Put the mouse pointer on the icon (without clicking). The connection window appears: | Put the mouse pointer on the icon (without clicking). The connection window appears: | ||
[[File:Tunnelblick_Run_2.png|300px]] | |||
And click on “Connect”: | And click on “Connect”: | ||
[[File:Tunnelblick_Run_3.png|500px]] | |||
Type the password we sent you for the corresponding configuration file. If you want, you can store the password in your Keychain by checking the “Save in Keychain” box, so you don’t have to type it each time you use Tunnelblick. Click on OK. You will see the status changing until it says “Connected” and the connection window disappears. The Tunnelblick icon will be as follows: | Type the password we sent you for the corresponding configuration file. If you want, you can store the password in your Keychain by checking the “Save in Keychain” box, so you don’t have to type it each time you use Tunnelblick. Click on OK. You will see the status changing until it says “Connected” and the connection window disappears. The Tunnelblick icon will be as follows: | ||
Revision as of 15:26, 22 February 2016
Introduction
This guide will explain how to connect to your virtual machines, which aren’t accessible from the Internet, using the OpenVPN protocol. It will explain how to install Tunnelblick (OpenVPN client for Mac) on your mac as well as how to use it.
This guide assumes that you have some experience with OSX and that you have administrative rights on the computer on which Tunnelblick will be installed.
Installation
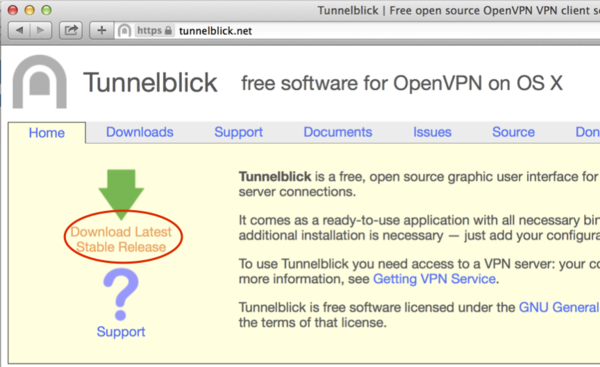
Go to https://tunnelblick.net:
And click on “Download Latest Stable Release”. The Tunnelblick disk image file (a “.dmg” file) will be stored in your downloads folder.
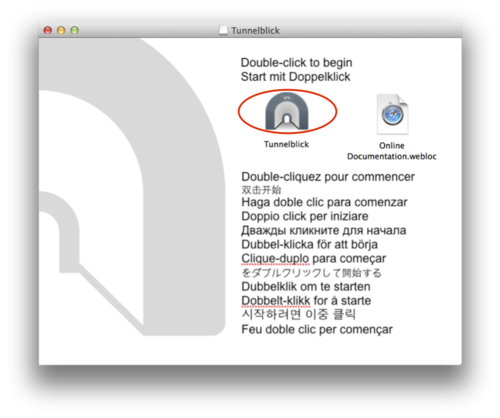
Open the downloaded disk image file (which mounts the disk image):
And double-click the “Tunnelblick” icon (it may be labeled “Tunnelblick.app”):
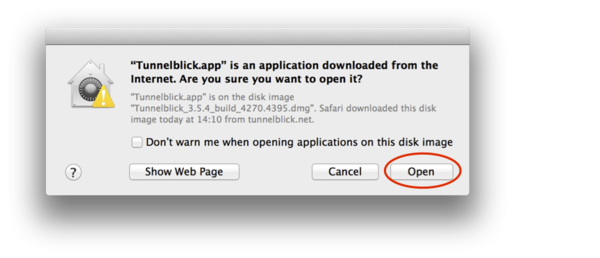
You may get the following warning:
Click on “Open” to continue.
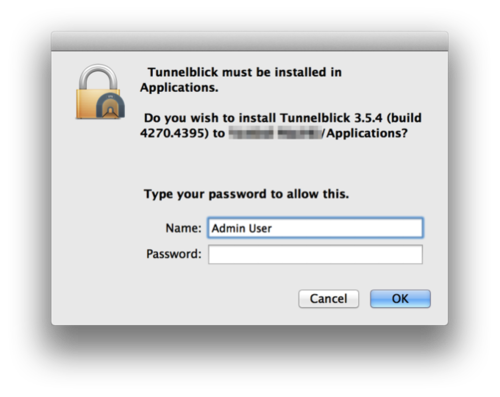
The following screen appears:
Type your password and click on “OK”.
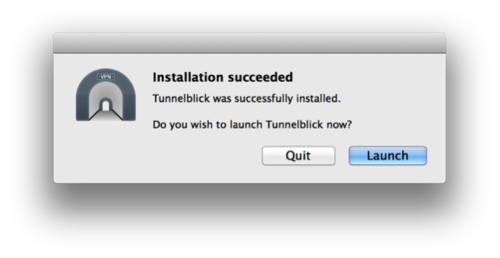
Click on “Launch”:
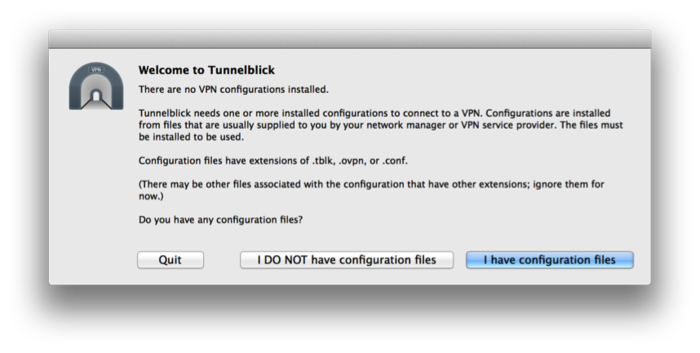
Click on “I have configuration files”. You will see the following screen:
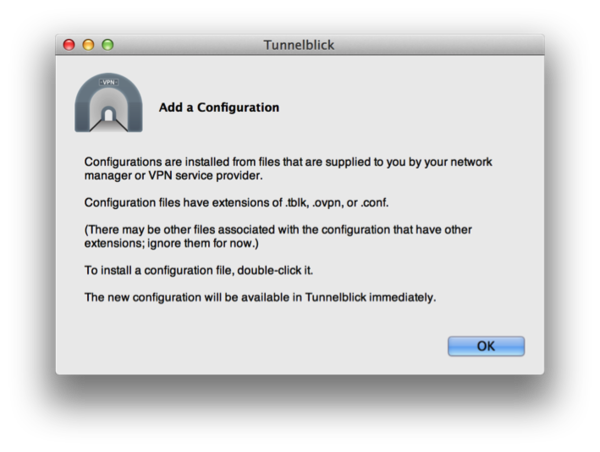
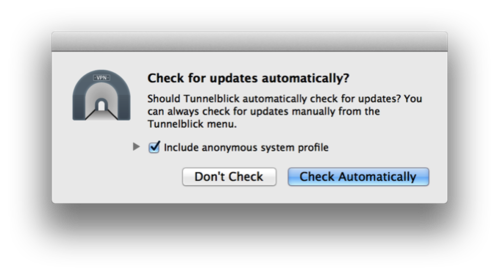
Before you can click on “OK”, the following screen appears:
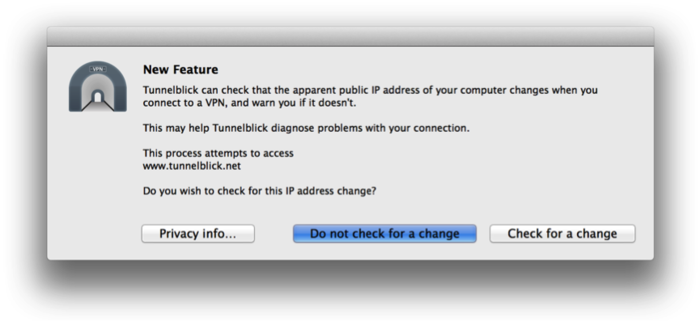
Click on “Do not check for a change”. The next screen appears:
Click on “Check Automatically”.
Now you can click on OK on the previous screen. The Tunnelblick installation is complete.
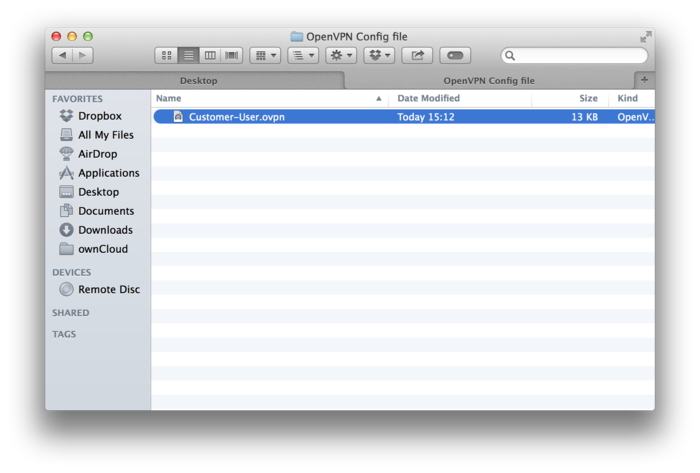
To install the necessary configuration files, open the folder where you have stored the files we sent you:
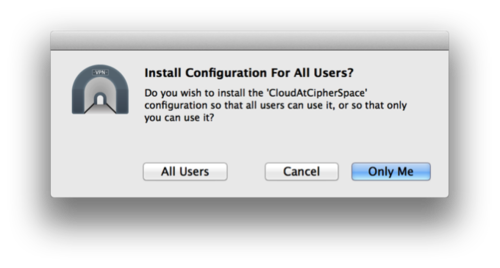
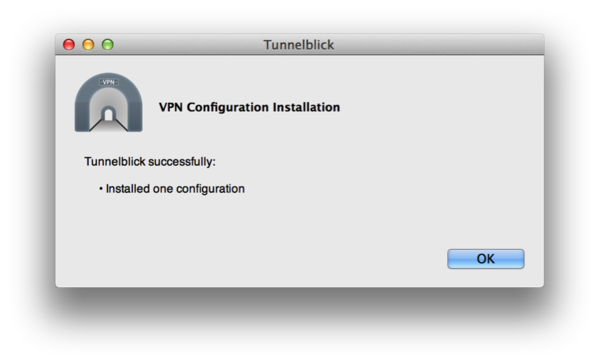
And double-click on the “.ovpn” file. The following screen appears:
If you have several users on this machine, who need to access the virtual machines, click on “All Users”, otherwise click on “Only Me”:
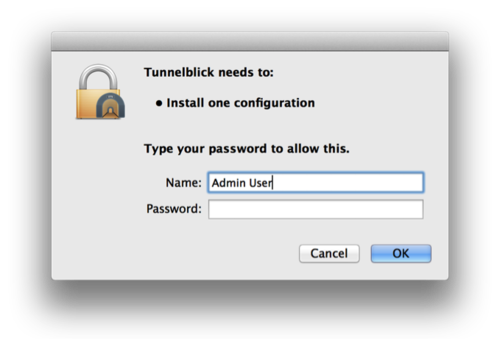
Type your password and click on OK:
Click on OK. The configuration file has been copied from your folder into Tunnelblick and are not needed anymore.
Running Tunnelblick
If Tunnelblick isn’t already launched, double-click on the “Tunnelblick” app located in your “Applications” folder. The following icon appears on the top right of your screen:
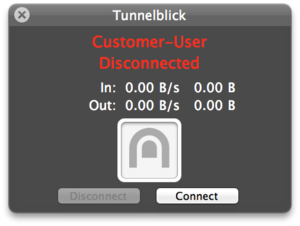
Put the mouse pointer on the icon (without clicking). The connection window appears:
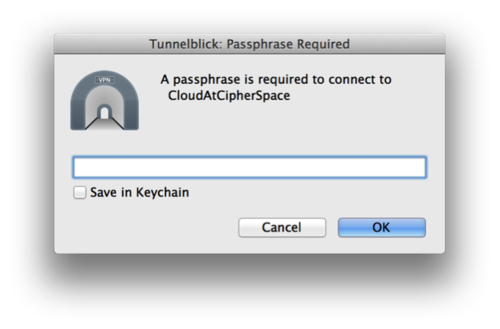
And click on “Connect”:
Type the password we sent you for the corresponding configuration file. If you want, you can store the password in your Keychain by checking the “Save in Keychain” box, so you don’t have to type it each time you use Tunnelblick. Click on OK. You will see the status changing until it says “Connected” and the connection window disappears. The Tunnelblick icon will be as follows:
If you cannot get connected, please contact us.
You may get the following warning:
If you do, check the “Do not check for IP address changes” box and click on OK.
Another method to connect is to click on the Tunnelblick icon ( ):
And in the drop-down menu select “Connect <Customer-User>” (where <Customer-User> corresponds to your VPN configuration).
You should now test the VPN connection by opening a terminal window, (Click on the icon on the top right of your screen, type “Terminal” and select the application) and type “ping xxx.xxx.xxx.xxx”, where xxx.xxx.xxx.xxx is the IP address of a virtual machine, which is not published on the Internet. If you cannot access the virtual machine, please contact us.
To disconnect from the VPN, put the mouse pointer on the icon (without clicking). The connection window appears:
And click on “Disconnect”.
You can also click on the Tunnelblick icon ( ):
And select “Disconnect CloudAtCipherSpace”
