Difference between revisions of "OpenVPN Guide Windows"
Client Admin (talk | contribs) |
|||
| (21 intermediate revisions by 2 users not shown) | |||
| Line 1: | Line 1: | ||
[[Category:OpenVPN]] | |||
[[Category:How To]] | |||
[[Category:CloudInfrastructure]] | |||
==Introduction== | ==Introduction== | ||
| Line 5: | Line 9: | ||
This guide assumes that you have some experience with Windows and that you have administrative rights on the computer on which the client will be installed. | This guide assumes that you have some experience with Windows and that you have administrative rights on the computer on which the client will be installed. | ||
N.B.: This guide is for a Windows | N.B.: This guide is for a Windows 10 operating system. For other Windows versions, the layout may be different, but the principles remain the same. | ||
==Installation== | ==OpenVPN Client Installation== | ||
The OpenVPN Client Installer can be found at https://openvpn.net/index.php/open-source/downloads.html | The OpenVPN Client Installer can be found at https://openvpn.net/index.php/open-source/downloads.html. | ||
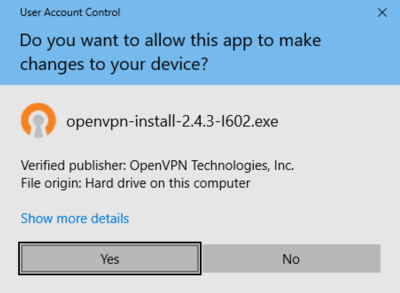
Once the download is finished, run the installer. You may get the following warning: | Once the download is finished, run the installer. You may get the following warning: | ||
[[File:OpenVPN_Win_Install_1.png|400px]] | [[File:OpenVPN_Win_Install_1.png|400px|border]] | ||
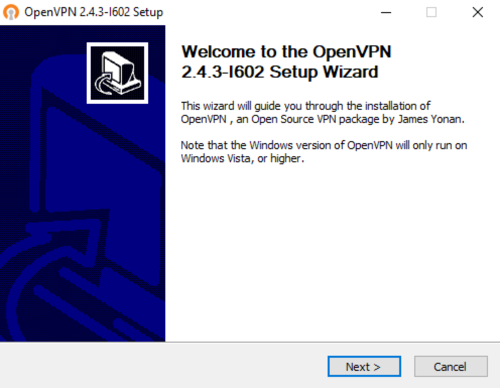
Click on “Yes” to continue. The following screen appears: | Click on “Yes” to continue. The following screen appears: | ||
[[File:OpenVPN_Win_Install_2.png| | [[File:OpenVPN_Win_Install_2.png|500px|border]] | ||
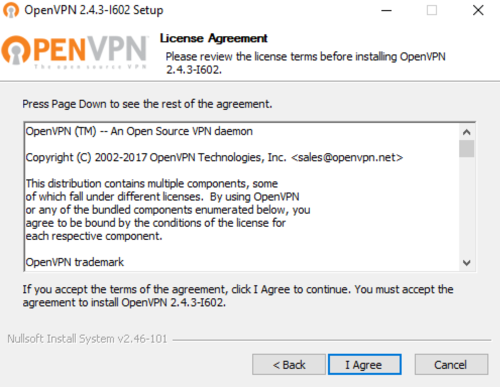
Click on “Next >”. The License Agreement screen is displayed: | Click on “Next >”. The License Agreement screen is displayed: | ||
[[File:OpenVPN_Win_Install_3.png|500px|border]] | |||
Click on “I Agree” to continue. | |||
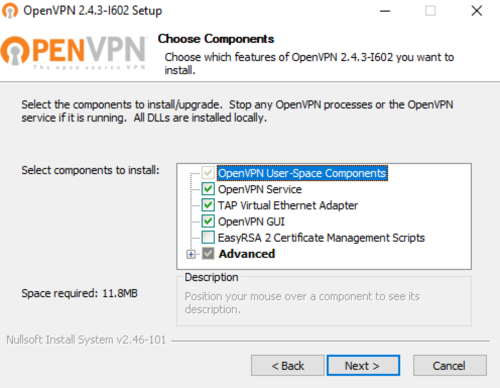
The next screen asks you to choose components to install: | |||
[[File:OpenVPN_Win_Install_4.png|500px|border]] | |||
Leave the chosen components unchanged and click on “Next >”. | |||
The next screen asks you for the installation location: | |||
[[File:OpenVPN_Win_Install_5.png|500px|border]] | |||
Click on “Install”. The installation starts: | Click on “Install”. The installation starts: | ||
[[File:OpenVPN_Win_Install_6.png|500px|border]] | |||
The installer may ask you to confirm the installation of the TAP Virtual Ethernet Adapter: | The installer may ask you to confirm the installation of the TAP Virtual Ethernet Adapter: | ||
Click on “Install”. The installation continues: | [[File:OpenVPN_Win_Install_7.png|500px|border]] | ||
Click on “Install”. | |||
The installation continues: | |||
[[File:OpenVPN_Win_Install_8.png|500px|border]] | |||
Click on “Next >” to finish the installation: | Click on “Next >” to finish the installation: | ||
[[File:OpenVPN_Win_Install_9.png|500px|border]] | |||
Deselect the “Show Readme” and click on “Finish”. | |||
==CipherSpace Configuration Installation== | |||
Open a Windows Explorer window, go to <code>C:\Users\<user>\OpenVPN\config\</code> | |||
(where <code><user></code> is your Windows username) and copy the file (or files) you have received from us. | |||
[[File:OpenVPN_Win_Config_1.png|600px|border]] | |||
==Running OpenVPN== | |||
(including for the first time) | |||
Double-click on the “OpenVPN GUI” icon on your desktop: | Double-click on the “OpenVPN GUI” icon on your desktop: | ||
[[File:OpenVPN_Win_Run_1.png|37px]] | |||
You should now see the following icon at the bottom right of your screen: | You should now see the following icon at the bottom right of your screen: | ||
If you don’t, | [[File:OpenVPN_Win_Run_3.png|37px]] | ||
If you don’t, follow the instructions described [[#Make the OpenVPN Icon Visible|here]] | |||
When you can see the OpenVPN GUI icon ([[File:OpenVPN_Win_Run_11.png|20px]]), double-click on it and the connection will start. | |||
* Enter in the Username & Password provided to you | |||
* Then type in the encryption passphrase: Type the password we sent you for the corresponding configuration file. If you want, you can store the password in your Keychain by checking the “Save in Keychain” box, so you don’t have to type it each time you use Tunnelblick. Click on OK. | |||
[[File:OpenVPN_Win_Run_7.png|500px|border]] | |||
You can also select "Save Password" | |||
The connection continues. | The connection continues. | ||
[[File:OpenVPN_Win_Run_8.png|500px|border]] | |||
Then the above window closes and you will see a similar message: | Then the above window closes and you will see a similar message: | ||
[[File:OpenVPN_Win_Run_9.png|250px|border]] | |||
And the OpenVPN icon is now green. | And the OpenVPN icon is now green. | ||
You should now test the VPN connection by opening a command window, (Click on “Start” then under “Search programs and files” type “cmd”) and type “ping xxx.xxx.xxx.xxx”, where xxx.xxx.xxx.xxx is the IP address of a virtual machine, which is not published on the Internet. If you cannot access the virtual machine, please contact us. | You should now test the VPN connection by opening a command window, (Click on “Start” then under “Search programs and files” type “cmd”) and type “ping xxx.xxx.xxx.xxx”, where xxx.xxx.xxx.xxx is the IP address of a virtual machine, which is not published on the Internet. If you cannot access the virtual machine, please contact us. | ||
To disconnect the VPN connection, double-click on the OpenVPN icon (green): | To disconnect the VPN connection, double-click on the OpenVPN icon (green): | ||
[[File:OpenVPN_Win_Run_10.png|500px|border]] | |||
And click on “Disconnect”. | And click on “Disconnect”. | ||
===Make the OpenVPN Icon Visible=== | |||
Open the “Control Panel”: | |||
[[File:OpenVPN_Win_Run_12.png|600px|border]] | |||
In the “Search Control Panel” field, type “Notification area”: | |||
[[File:OpenVPN_Win_Run_13.png|600px|border]] | |||
And click on “Taskbar and Navigation”. | |||
[[File:OpenVPN_Win_Run_14.png|600px|border]] | |||
Scroll until you find the “Notification area” and click on "Select which icons appear on the taskbar": | |||
[[File:OpenVPN_Win_Run_15.png|400px|border]] | |||
Look for "OpenVPN GUI for Windows", move the switch button to "on" and close the "Control Panel". The OpenVPN icon will be now visible at the bottom right of your screen. | |||
Latest revision as of 14:16, 16 December 2024
Introduction
This guide will explain how to install the OpenVPN client on your PC as well as how to execute it in order to access your virtual machines that aren’t accessible from the Internet.
This guide assumes that you have some experience with Windows and that you have administrative rights on the computer on which the client will be installed.
N.B.: This guide is for a Windows 10 operating system. For other Windows versions, the layout may be different, but the principles remain the same.
OpenVPN Client Installation
The OpenVPN Client Installer can be found at https://openvpn.net/index.php/open-source/downloads.html.
Once the download is finished, run the installer. You may get the following warning:
Click on “Yes” to continue. The following screen appears:
Click on “Next >”. The License Agreement screen is displayed:
Click on “I Agree” to continue.
The next screen asks you to choose components to install:
Leave the chosen components unchanged and click on “Next >”.
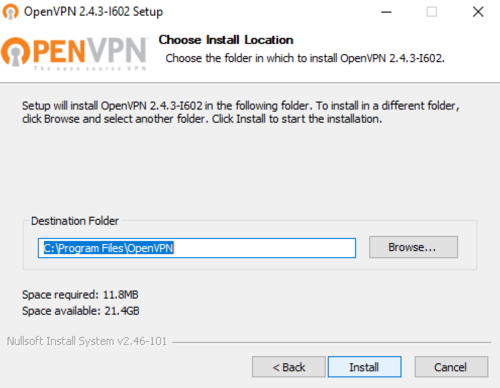
The next screen asks you for the installation location:
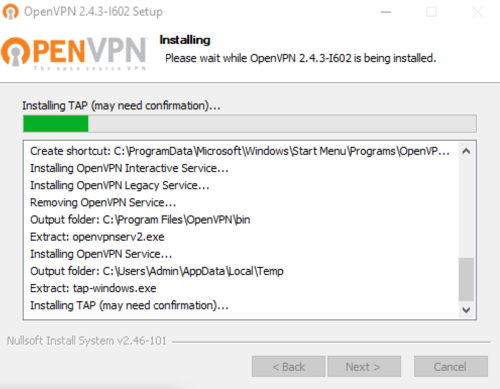
Click on “Install”. The installation starts:
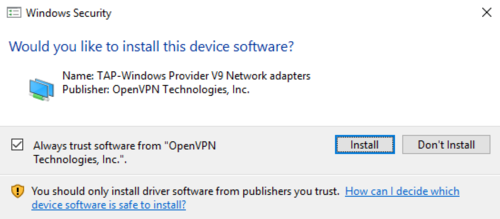
The installer may ask you to confirm the installation of the TAP Virtual Ethernet Adapter:
Click on “Install”.
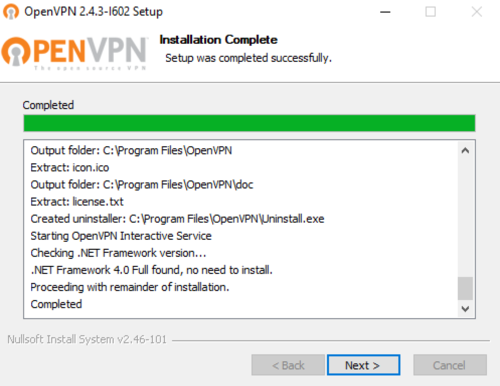
The installation continues:
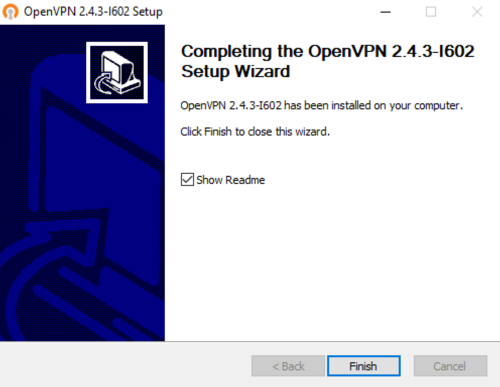
Click on “Next >” to finish the installation:
Deselect the “Show Readme” and click on “Finish”.
CipherSpace Configuration Installation
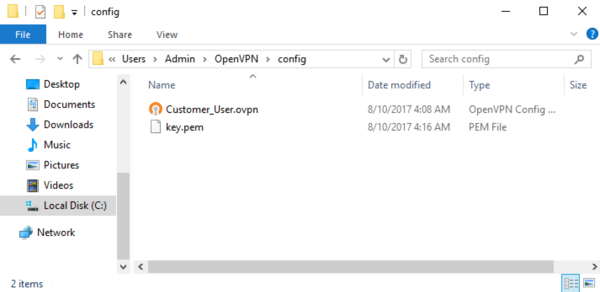
Open a Windows Explorer window, go to C:\Users\<user>\OpenVPN\config\
(where <user> is your Windows username) and copy the file (or files) you have received from us.
Running OpenVPN
(including for the first time)
Double-click on the “OpenVPN GUI” icon on your desktop:
You should now see the following icon at the bottom right of your screen:
If you don’t, follow the instructions described here
When you can see the OpenVPN GUI icon (![]() ), double-click on it and the connection will start.
), double-click on it and the connection will start.
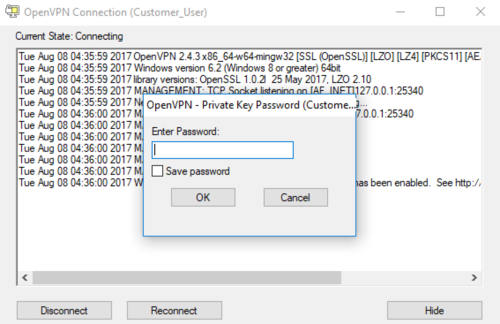
- Enter in the Username & Password provided to you
- Then type in the encryption passphrase: Type the password we sent you for the corresponding configuration file. If you want, you can store the password in your Keychain by checking the “Save in Keychain” box, so you don’t have to type it each time you use Tunnelblick. Click on OK.
You can also select "Save Password"
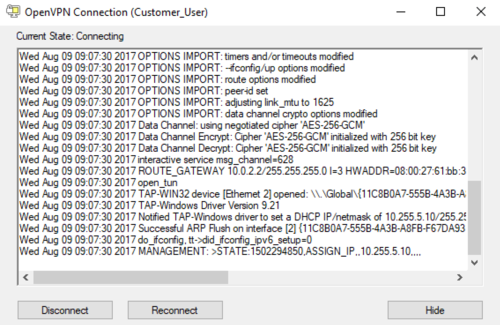
The connection continues.
Then the above window closes and you will see a similar message:
And the OpenVPN icon is now green.
You should now test the VPN connection by opening a command window, (Click on “Start” then under “Search programs and files” type “cmd”) and type “ping xxx.xxx.xxx.xxx”, where xxx.xxx.xxx.xxx is the IP address of a virtual machine, which is not published on the Internet. If you cannot access the virtual machine, please contact us.
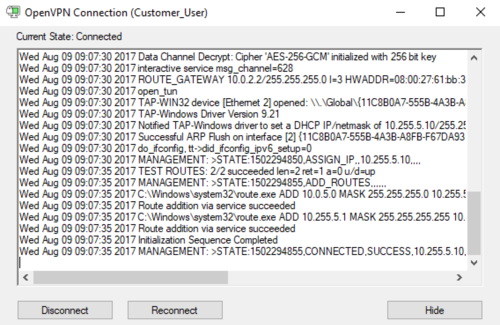
To disconnect the VPN connection, double-click on the OpenVPN icon (green):
And click on “Disconnect”.
Make the OpenVPN Icon Visible
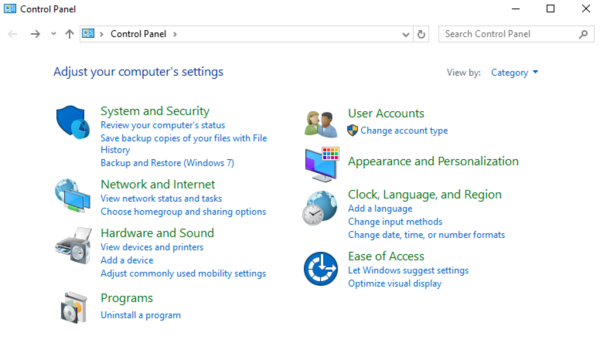
Open the “Control Panel”:
In the “Search Control Panel” field, type “Notification area”:
And click on “Taskbar and Navigation”.
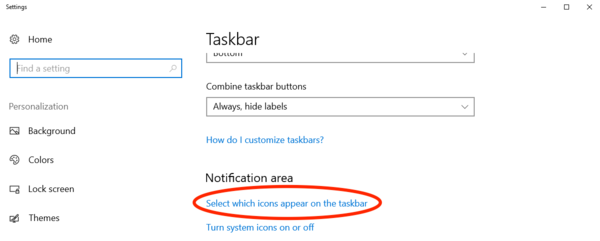
Scroll until you find the “Notification area” and click on "Select which icons appear on the taskbar":
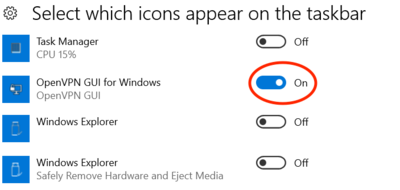
Look for "OpenVPN GUI for Windows", move the switch button to "on" and close the "Control Panel". The OpenVPN icon will be now visible at the bottom right of your screen.
